• About Us
  • Contact Us
  • Privacy Policy
  • Image Credits

Adult Coloring In Books

Coloring in for grown ups

  • Home
  • About Coloring
  • Benefits of Coloring
  • Reviews
  • Free Printable Coloring Pages
  • Buy Coloring Books

Prismacolor Premier Soft Core Colored Pencils – why it’s not just about pigment quality

December 4, 2015 by Admin 3 Comments

Box set of Prismas

Box set of Prismas? Yes, please!

I’m a member of quite a few online coloring groups, as well as two face-to-face groups, and in the past year I’ve been bombarded on all sides with chatter about Prismacolor Premier Soft Core Colored Pencils. It appears that many folks of my acquaintance would happily part with a limb in exchange for a 150 box-set of ‘Prismas’, including people who have never actually used them and are going on reputation alone.

Some of you may think, well, a pencil is a pencil. Why would someone spend money on a ‘premier’ colored pencil instead of whatever you can pick up at your local newsagent? I mean…come on, it’s just a pencil!

Excellent question. Here’s what you should know.

Prismacolor Premier Soft Core Colored Pencils - set of 150

Prismacolor Premier Soft Core Colored Pencils – set of 150

Why buy Prismacolors?

Prismacolor colored pencils are at the luxury end of the adult coloring in market. They cost more, but the color pigments in them are exceptionally good. They are popular for the following reasons:

  • there is an EXTENSIVE color range – people often say they can hold two different shades of blue next to each other, and not be able to tell the difference, so fine are the graduations between hues;
  • they are available in a broad range of sets that match different price points – currently you may purchase sets of 12, 24, 36, 48, 60, 72, 96, 132, or 150 (there are also special series, such as Manga colors);
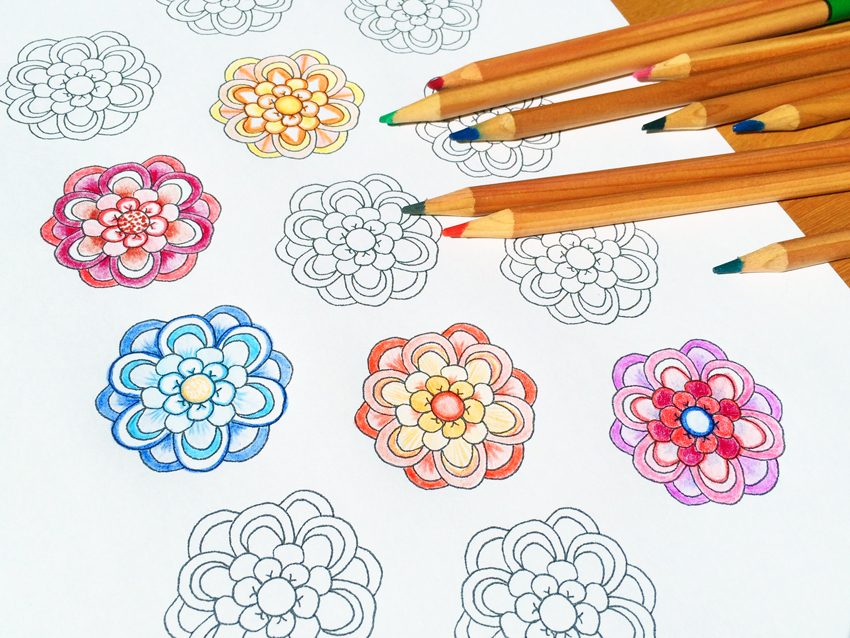
  • you may also purchase INDIVIDUAL pencils – so if you sharpen your ‘Sunburst Yellow PC 917’ pencil right down to a stub, then you can just go out and buy a new one. And if your favorite color is green and you want twenty different shades of green in your pencil case, you can go out and just buy the colors you want;
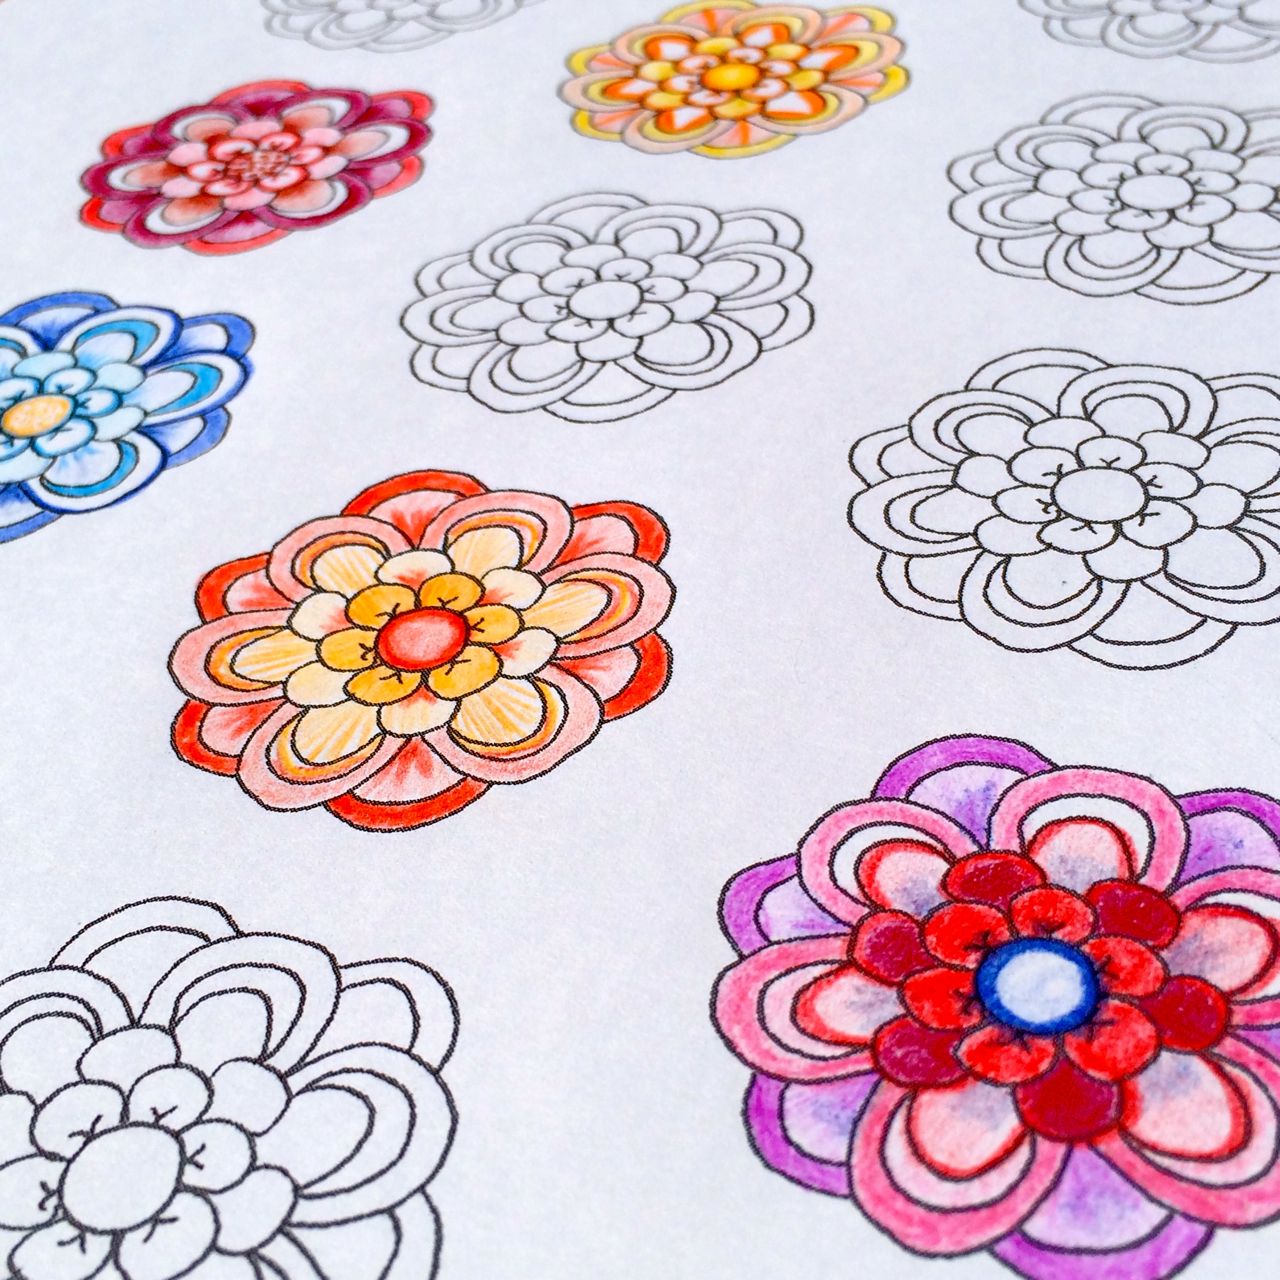
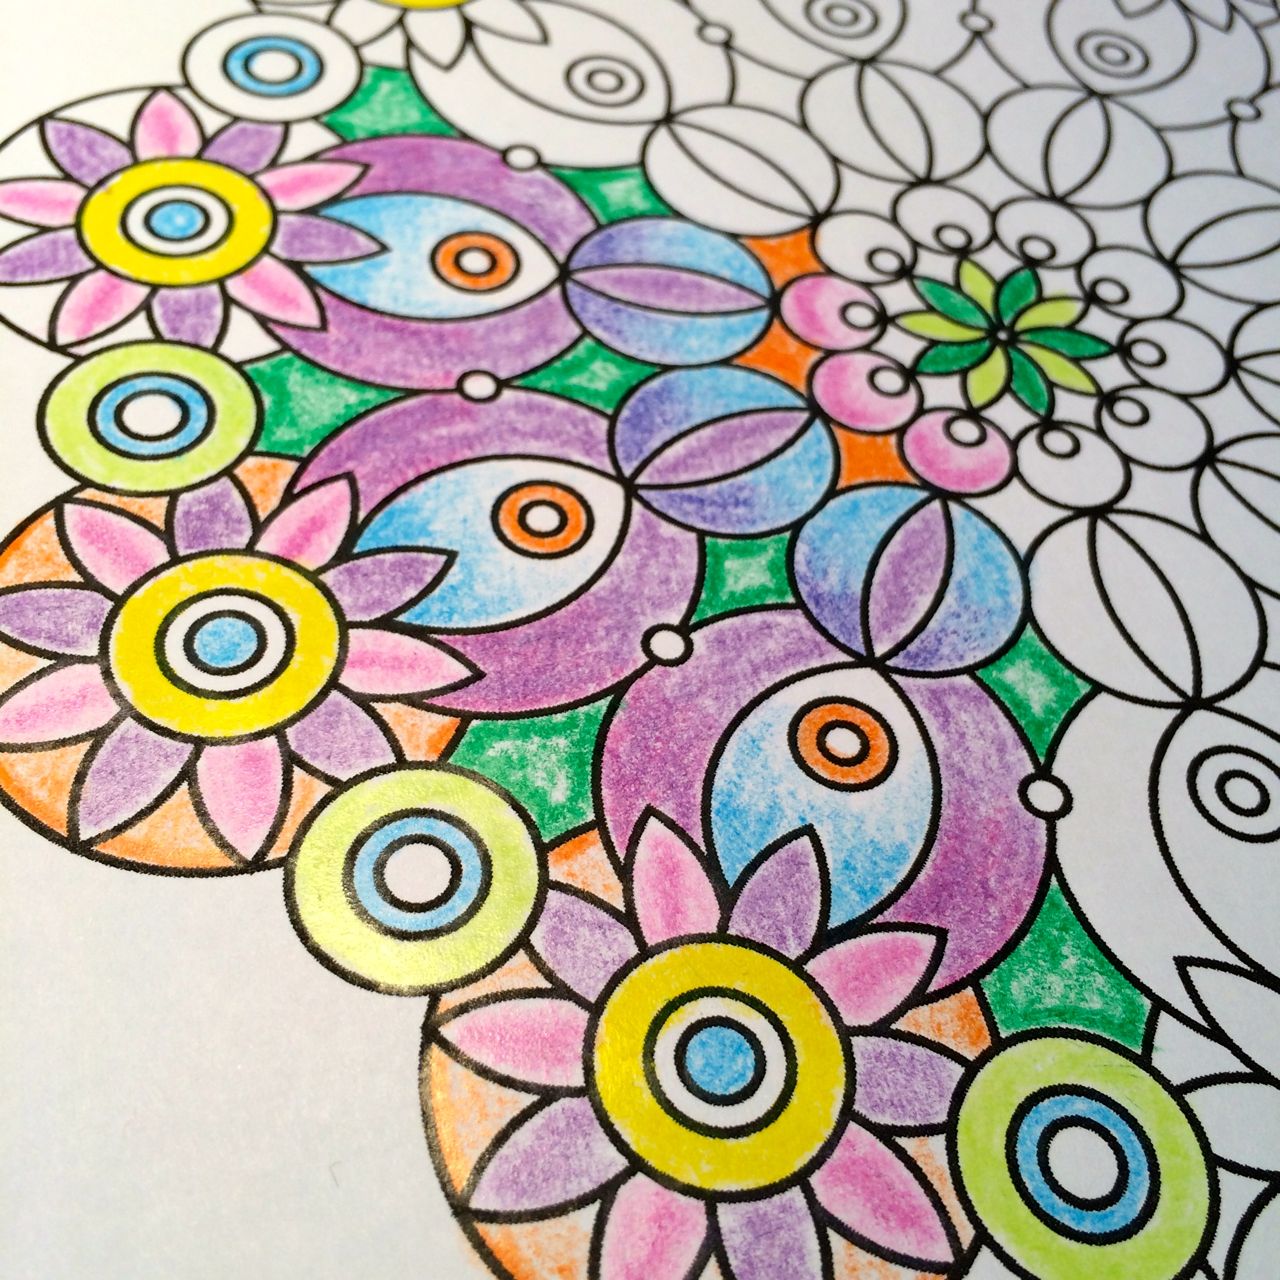
  • Prismacolor Premier Soft Core Colored Pencils (quite a mouthful of title for a humble pencil) have soft leads, so they are optimised for shading and blending – it’s much easier to get beautifully rendered effects with soft core pencils;
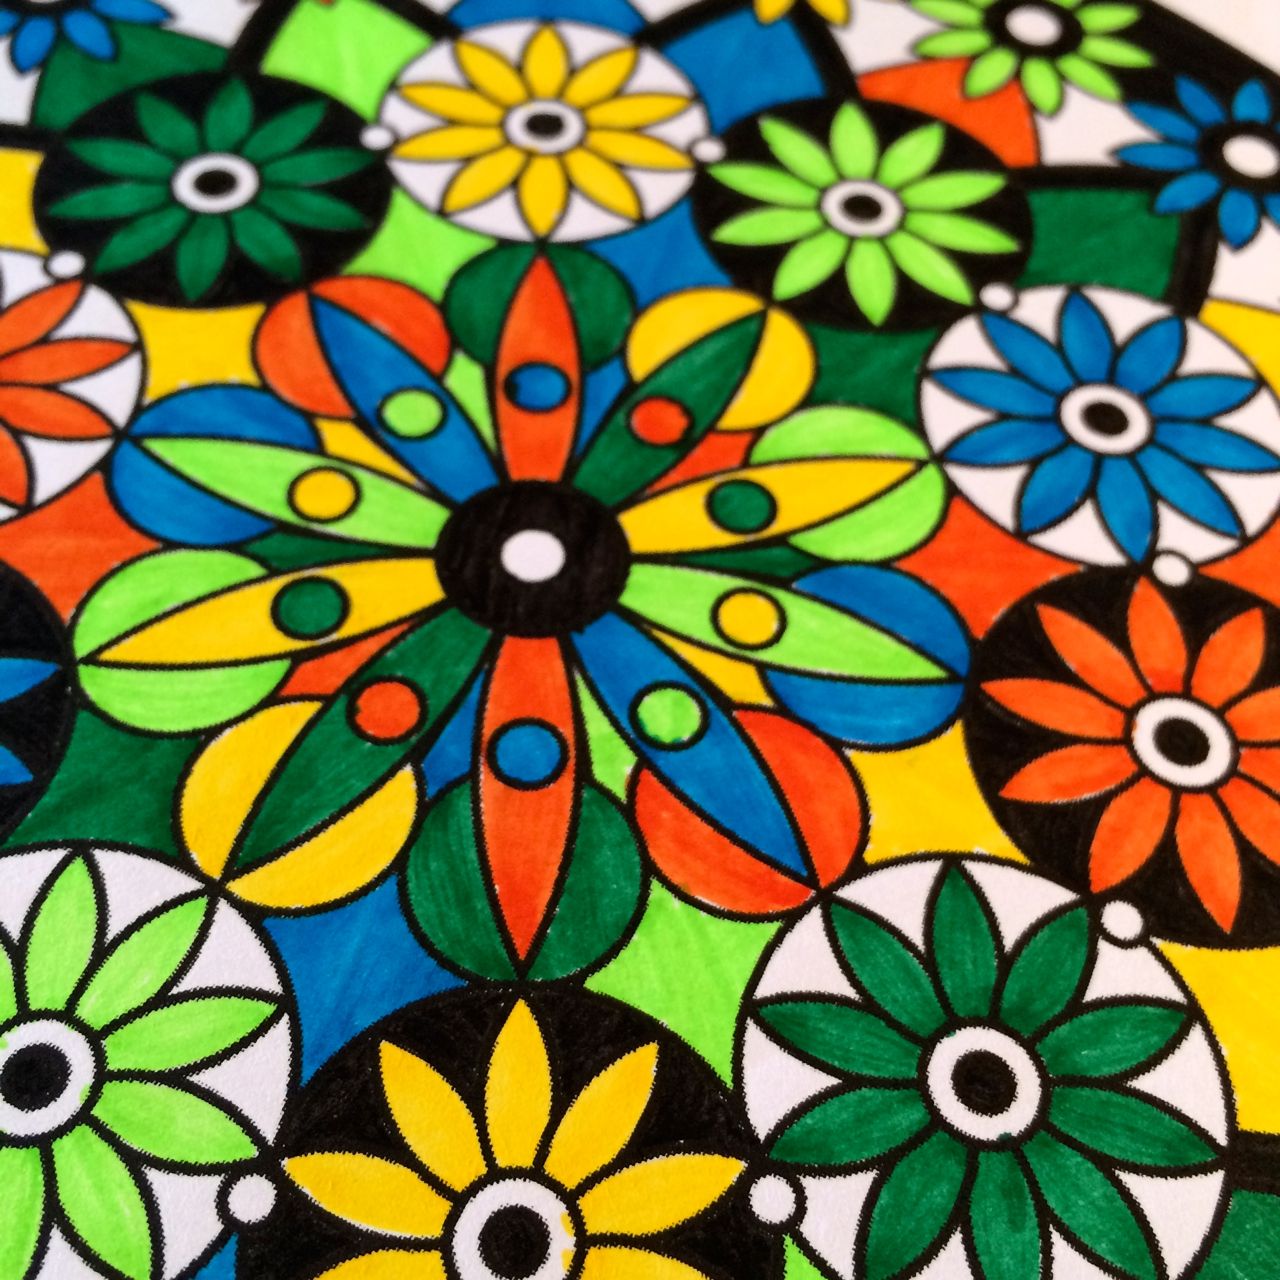
  • and finally (but most importantly), they use high quality pigments for really rich, vibrant color saturation – it’s similar to buying artists’ quality paints – they cost more because of what they’re made of, but as with most high quality products, you get what you pay for.

So there are all the PRACTICAL, sensible reasons that people buy Prismas.

But most people, when I’ve asked why they spashed out on Prismacolors, have said things like this:

‘I get hardly any time to myself, and I really love coloring, so I wanted to spoil myself with some Prismas as a way of celebrating my ‘me time’

‘I was sick of borrowing the kids pencils and I thought I’d buy something special that was just for me’

‘I really wanted to treat myself – I saved up for three months, and after I finally ordered them I kept checking the post every day until they turned up!’

So there you go. Despite all the practical fabulousness of Prismas, it was the idea of ‘spoiling yourself’ with something special that got quoted almost every time. Like any other luxury item, the biggest benefit is often the feel-good factor. Quality pigments and beautiful blending tools are just glitter-pen icing on the cake.

Filed Under: Colored Pencils Tagged With: Prismacolor colored pencils, Prismacolor coloured pencils, Prismacolor Premier Soft Core Colored Pencils, Prismas

How to Color In – Part 3: Learn How to Shade and Improve Your Shading Techniques

December 3, 2015 by Admin Leave a Comment

Coloring in with colored pencils

Coloring in with colored pencils

I hope you have enjoyed Part 1 and Part 2 of this series of blog posts on ‘How to Color In’.

This third post is the first one to discuss specific coloring techniques, and we’re starting with the most basic coloring in technique – shading.

What is shading?

Pencil shading involves moving a pencil back and forth on paper to fill in an area of a coloring page.

Increasing downward pressure results in darker or more intense color, while lighter pencil pressure gives a softer and lighter effect.

Some colorists use just the tip of the pencil, while others tilt the pencil at an angle so that the side length of the pencil lead is in contact with the paper, and not just the tip. Because more of the pencil lead is in contact with the paper at once, this allows the colorist to shade in a larger area in a shorter period of time.

Crayons may also be used for shading, but not standard markers (though some special blender markers produce a ‘shade’ effect that creates graduations of color with markers).

Types of shading

Flat shading

Flat shading is required if you want to color an area and have it all look even. If you want to produce a consistent shade, keep an even pressure on the pencil while coloring in. The better you can control and maintain the same pressure on your pencil, the smoother and more consistent your result will be.

Graduated shading

Graduated shading means going from dark to light (heavier pressure to lighter pressure on the pencil) or light to dark (lighter pressure to heavier pressure on the pencil). Graduated shading gives a contour effect to colored in objects, making them look more three-dimensional.

Blending colors shading

Many colorists are confused about how to use shading to smoothly move from one color to another across an image. For example, they may be coloring in a picture of a skirt, which they want to be blue from the waist down, but purple from the knees up, blending halfway between to make a perfect wash of color that smoothly transitions from blue to purple in the middle.

The simplest way to do this two-color blended shading, is to use graduated shading in opposite directions. In the example above, you would use blue pencil first, shading from dark at the waist to light just above the knees. Then you would use a purple pencil, shading from dark at the bottom of the skirt and getting lighter until you had almost reached the waist. Halfway between the two colors you should have a 50/50 mix of blue and purple. When blending shading is done well, one color should seamlessly fade in to the next. This takes practice, but can be perfected in a surprisingly short period of time if you work slowly and carefully.

My best shading tips

They key to shading for beginners is to work slowly. Quick shading generally produces an uneven texture with too much pressure in places (which means you have to go back over the lighter sections to even it up, and if you go too far then you need to darken up other parts, and it gets heavy-handed pretty quickly).

Use a light touch and build up your color gradually. Start with smaller areas – it’s much easier to be consistent across a small area than a big one.

Try to go all the way from one side of the outline of the area you’re coloring in, to the other side of the outline, with each stroke of the pencil. Shade so that your pencil is travelling the shortest width with each stroke instead of the longest for the most even result.

Filed Under: How to Color In Tagged With: coloring in shading, how to shade, learn how to shade, shading, shading tips

How to Color In – Part 2: What to Color In With?

September 12, 2015 by Admin 2 Comments

A selection of coloring pencils, crayons, markers and pens

A selection of coloring pencils, crayons, markers and pens

Welcome back to our series on How to Color In (and here’s the link to Part 1 if you missed it).

In this post, we’ll be talking about what to color in with.

Sound simple? Not these days! There are a huge number of choices available to colorists these days, and if you’re new to coloring in (or returning after a loooong absence!), you’ll probably be looking for some advice on what drawing materials to use. So let’s get started.

What to color in with?

There are many different types of drawing media that colorists use, but the most common ones are:

  • colored pencils;
  • crayons;
  • markers (also called pens or textas);
  • pastels and oil pastels;
  • inks; and
  • paints (i.e. acrylic, gouache, watercolors).

By far, the most popular choices are the first three on this list – colored pencils, crayons and markers, so I’ll focus on what you need to know about each of them.

Colored pencils

Coloring in with colored pencils

Coloring in with colored pencils

Colored pencils are probably the most popular choice for adults who color in. Here’s why:

PROS

  • they’re affordable;
  • they come in a huge range of colors;
  • they have good blending properties (unlike markers, which don’t blend well at all), so it’s possible to create beautiful fades from one color to another within a single coloring area;
  • they can give soft, even coverage, and by changing the amount of pressure you apply when you color, it is possible to create light and shade effects with a single pencil;
  • they can be sharpened to a fine point to make it easier to color in smaller areas;
  • they last for ages and can’t dry out like markers, inks or paints;
  • they can be lightly erased if you make a mistake or accidentally go outside the lines;
  • you have the option of buying watercolor pencils, which you can use to color in like normal pencils, but by adding water with a brush, you can produce a watercolor paint effect;
  • because pencils are not ink-based, they do not bleed through pages to the other side of the paper.

CONS

  • many colored pencils use cheap pigments, which can look faded and pale even if you press hard, making it difficult to get intense color (premier brands such as Prismacolor use extremely high quality pigments and produce very intense colors, however they’re more expensive);
  • it can take a while to color in larger areas, as even when you’re shading (coloring in with the side of the pencil instead of the tip), as the pencil only covers a small surface area at a time;
  • unlike markers, they need to be handled carefully – if you drop them and break the pencil leads inside the pencil, they will keep breaking when you sharpen them.

Crayons

Coloring in with crayons

Coloring in with crayons

Crayons are also popular, for the following reasons:

PROS

  • they give a guaranteed nostalgia hit! They’re probably what you used to color with most as a kid, so the waxy smell and texture and feel of them can really take you back;
  • they are often cheaper than colored pencils;
  • plenty of colors to choose from (though not as many as colored pencils);
  • like pencils, they last for ages and can’t dry out like markers, inks or paints;
  • they are usually chunkier than pencils so you can color in larger areas more quickly;
  • chunkier crayons can be especially great for people who have trouble gripping smaller drawing implements (due to arthritis or other conditions – the fact that they’re so easy to hold is also why they’re perfect for kids, who are still developing fine motor control skills);
  • different colors can be successfully blended together, or faded from one hue to another, within a coloring area.

CONS

  • less control and precision – it’s much harder to color tiny areas with a crayon, as the tips of crayons are usually wider and not as precise as pencils or markers;
  • because crayons have a waxy texture, they do not provide flat, even color, and can look speckled (of course this is only a ‘con’ if you don’t like the speckled effect – many colorists love it);
  • the shape of a crayon’s tip is easily worn down but cannot be sharpened, which can sometimes make it hard to stay in the lines when you color in;
  • cheaper brands can have more wax than pigment, meaning the colors aren’t great and they don’t feel good to use;
  • they can melt in hot conditions – never leave them in a hot car.

Markers

Coloring in with markers and pens

Coloring in with markers and pens

Markers, also referred to as textas and pens, are also a very popular choice for colorists, because:

PROS

  • the ink immediately gives you a really intense color effect (that you can only get with pencils and crayons by using high quality pigments and hard pressure);
  • markers come in a broad range of tip sizes, from extremely fine to jumbo;
  • quality fineliners in particular are amazing for coloring very intricate designs (it can be difficult to get intense color in a very small area using a pencil, and crayons are usually way too chunky for fine coloring);
  • enormous range of colors to choose from;
  • they are inexpensive, though they generally cost slightly more than pencils and crayons;
  • you can create unusual effects using specialty markers such as metallic and fluorescent pens, that cannot be replicated with colored pencils or crayons;
  • extra-creative colorists often use a black fine tipped marker to add patterns or extra details to original designs before coloring in – this allows you to individualize your work even more, and can make a simple design more interesting.

CONS

  • if you have coloring book with designs on the backs and fronts of pages, markers often bleed through to the other side, staining the other image;
  • markers can look ‘streaky’ (you can clearly see each stroke of the marker), especially if you color over an area more than once;
  • if the paper is poor quality or too thin, going over an area with a marker may put a hole in the page;
  • markers cannot color blend the way that colored pencils or crayons can, so getting smooth, graduating shades from one hue to another is not possible using markers;
  • if you leave the caps off, they will dry out and become useless – so keep more expensive markers away from kids!

As you can see, there are good and bad points for colored pencils, crayons, and markers, so it’s a matter of thinking about the kinds of coloring in you prefer, and then choosing the best tool for the job. You will probably find that experimentation and play is the best way to work out your preferences.

Mixing it up

There’s no reason to choose only one way to color in! Most colorists tend to enjoy using more than one medium. The most prevalent examples of mixed-media work that I’ve seen tend to use colored pencils in conjunction with markers and specialty pens.

In Part 3, we’re going to start talking about coloring techniques, so stay tuned. And as always, if you have any questions or comments, please post them here!

By the way…can you think of any other pros or cons that we can add to our lists? Thanks :)

Filed Under: How to Color In Tagged With: colored pencils, coloring pencils, coloured pencils, colouring pencils, crayons, markers, pens, textas, what to color in with, what to color with, what to colour in with, what to colour with

How to Color In – Part 1: Introduction & Basic Coloring In Materials

September 11, 2015 by Admin 2 Comments

Introduction

'Lucky Thirteen', one of the free coloring downloads on this site

‘Lucky Thirteen’, one of the free coloring downloads on this site

This post is the first in a series on how to color in. It’s one of those things that can be very simple, or very complex. It all depends on the type of pictures you enjoy coloring, and whether you want to challenge yourself with more difficult and intricate coloring projects.

Maybe coloring in comes naturally to you, and maybe it doesn’t. Maybe you worry about choosing the wrong colors, or not being precise enough and staying in the lines. Maybe you just wish you were better at choosing color schemes that look really striking, or calming, or psychedelic, or beautiful.

As you’d already know, there’s no ‘right’ or ‘wrong’ way to color in. Anyone can pick up a coloring in pencil or marker or inked up brush and color in a picture. But people color for different reasons, and have different goals when they sit down to color.

Maybe you just want to relax and de-stress.

Maybe you don’t care too much about what the final product looks like, and just embrace the process of play and experimentation.

Maybe you’re totally meticulous about your work, and can take HOURS on a single image!

Maybe you keep your work in a portfolio. Or stick it up on your fridge and pin up boards.

Maybe you frame your artworks for wall display.

So who will this series of posts help? Well, whatever your level of skill or confidence, this series of posts will help you to create pictures that are more aesthetically pleasing to the eye.

The sort that people will look at and say, ‘Wow. That’s really cool.’

Or, ‘Tell me how you got that effect!’.

Or, ‘I really wish I could color like that.’

So let’s get started.

Basic Materials

One of the great things about taking up coloring in is that the start up costs are lower than most hobbies. You need only two things – a drawing to color in, and something to color with.

Where can I find something to color?

Made to color - a book, a magazine and a printable pdf download

Made to color – a book, a magazine and a printable pdf download

Due to the popularity of coloring at the moment, you can find things to color almost anywhere. You can easily locate coloring in books to purchase online, or at your local newsagents, book stores, art supply stores, and even supermarkets. Alternatively, you may wish to download individual coloring in pages, either for a fee or for free (each week we create new free printable coloring pages for adults right here on this site).

When choosing a coloring book, note that there are various levels of difficulty when it comes to coloring in. It’s usually best to start with simple designs that have larger areas to color. And don’t attempt anything too intricate unless you have the right tools (such as sharp pencils or fine-tipped markers).

What should I color in with?

Prismacolor coloring pencils

Prismacolor coloring pencils

There are many different media that colorists use, the most common ones being:

  • colored pencils
  • crayons
  • markers (also called textas)
  • pastels and oil pastels
  • inks
  • paints (i.e. acrylic, gouache, watercolors)

We’re going to explore each of these in much more detail, so read on for Part 2 – What to Color In With.

As always, if you have any questions or feedback, please write to us in the comments section. We’d love to hear from you!

Filed Under: How to Color In Tagged With: acrylic paint, colored pencils, coloring in pencils, coloured pencils, crayons, gouache, how to color, how to color in, inks, markers, paints, textas, watercolors, watercolours

Book Review: Coloring to Calm Volume 1 Mandalas by Shelly Fagundes

August 18, 2015 by Admin Leave a Comment

Title: Coloring to Calm, Volume 1 – Mandalas
Author: Shelly Fagundes
Publisher: Flying Donkey Press
Format: eBook (includes link to print pdf copy)
Release date: 13 August 2015
Available to buy from: Amazon Kindle Store
Cost: US$2.97

Number of drawings to color in: 25
Type of drawings: Mandala line drawings
Level of difficulty: some basic, mostly intermediate

DISCLAIMER: As a reviewer, I received a free ARC (advance reading copy) of this book. This has not affected my review in any way.

Released this week, Coloring to Calm, Volume 1 – Mandalas is the first offering in a new series from author Shelly Fagundes.

Interestingly, the book is currently only available as an eBook at the Kindle store.

‘But how can you color in an eBook?’ I hear you ask. ‘You can’t even PRINT a Kindle eBook.’

Ah. In this case you can. Fagundes has been smart enough to include a hyperlink at the back of the eBook that will allow you to download a pdf version of the book. This allows you to print out as many copies to color in as you wish (though I suspect that if the book does well, it will also be available in print form fairly soon).

The book contains 25 mandala designs, including the one below, which shows about the average level of detail for images in the book. A few of the drawings are more basic, and some are very intricate, but generally the book will suit intermediate colorers with a bit of experience.

If you tend to use markers instead of pencils, then you will need to ensure that you have a selection with finer tips (I like Staedtler Triplus), because there are very small, detailed areas to color in many of the drawings. Those using colored pencils should be fine, as long as you have a good sharpener.

Coloring in a mandala from Coloring to Calm Vol. 1

Coloring in a mandala from Coloring to Calm Vol. 1

All mandalas in the book are bound by a square box outline, so there’s the option of coloring to the edges of the box, or treating it as a frame of white space surrounding the mandala. Each mandala is placed in the middle of the printed page, making it easy to fit to a real frame in the future if desired.

The line designs have clear, clean edges and are of good quality. There is plenty of variety in the designs to keep you engaged, and for those who love coloring repetitive stripes and small chains of squares, there are enough to keep you occupied for hours. The most basic designs in the book can probably be colored within an hour, but the most complex are likely to take you several hours each (the fully colored image at the bottom of this post took me around 90 minutes to complete).

At US$2.97 the book provides excellent value at around 12 cents per design, with the bonus that you may print the drawings from the pdf copy of the eBook as many times as you like for personal coloring. This kind of freedom is especially likely to appeal to those of us who prefer to color on specialty papers instead of the cheaper paper stock usually utilised in printed coloring books. Great designs and value for money.

My completed colored mandala from Coloring to Calm Vol. 1

My completed colored mandala from Coloring to Calm Vol. 1

Filed Under: Book Reviews Tagged With: adult coloring in books, adult coloring in books review, adult colouring in book reviews, adult colouring in books, book review, Coloring to Calm, mandalas, pdf coloring books, Shelly Fagundes

  • 1
  • 2
  • Next Page »

Join Our Mailing List!

We respect your email privacy

Powered by AWeber Email Marketing

Like us on Facebook

Recent Posts

  • Prismacolor Premier Soft Core Colored Pencils – why it’s not just about pigment quality
  • How to Color In – Part 3: Learn How to Shade and Improve Your Shading Techniques
  • How to Color In – Part 2: What to Color In With?
  • How to Color In – Part 1: Introduction & Basic Coloring In Materials
  • Book Review: Coloring to Calm Volume 1 Mandalas by Shelly Fagundes

Coloring the Web

  • Facebook: Join our Community
  • Pinterest: Our Coloring In Pinboard
  • E-zine Article: What is an adult coloring book?

Amazon Bookstore

Copyright © 2025 · Metro Pro Theme on Genesis Framework · WordPress · Log in

  • Privacy Policy
  • Terms of Use
  • Contact Us
  • Affiliate Disclosure